In the first post in this series, we walked through upgrading the internal PC hardware within a ScreenMaster III 3216 hardware controller. In this post, we’re going to start creating the software to communicate between the internal computer and the hardware buttons, joystick, rotary encoders, and T-bar. All of the work discussed in this post lives in a GitHub repository that you can look through and use.
Before we dive in, let’s quickly agree on some terminology. I’m going to refer to the buttons, joystick, rotary encoders, and the T-bar collectively as the ‘keyboard’. Additionally, I’m going to refer to the Windows PC-based computer inside the console as the ‘host’. When we want to turn on or of a lamp for a button, for example, we’ll consider that to be a ‘host’ to ‘keyboard’ communication. Alternatively, when a user presses a key or moves the joystick a ‘keyboard’ to ‘host’ message will be generated. Hopefully this makes sense. Luckily the GitHub repository mentioned earlier in this post uses the same terminology in it’s documentation.
So how do we interact with the console hardware?
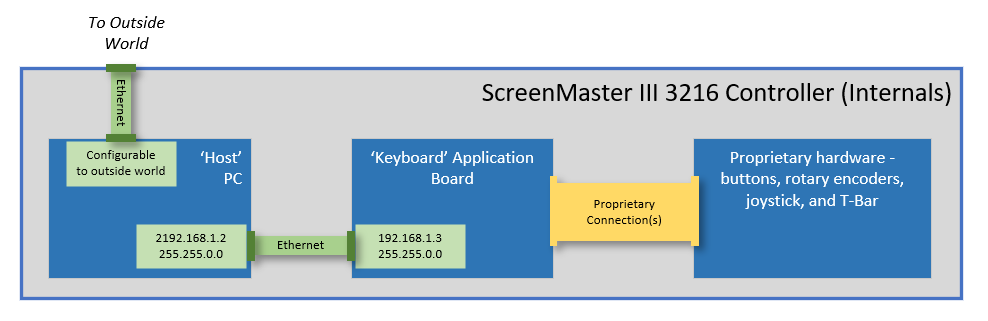
Communication between the host and keyboard is all performed using an internal Ethernet connection. This proved to be extremely helpful when upgrading the hardware, since we didn’t need esoteric connections to interface with the hardware. The keyboard has a hardcoded IP address of 192.168.1.3, and is hardcoded to send event messages to our host computer at the IP address of 192.168.1.2. This is quite limiting, but since it was initially designed to be an internal Ethernet connection we simply added a second USB network adapter during our PC upgrade dedicated to this interface. The image below shows the high-level Ethernet connectivity within the controller:
Over Ethernet, the messages between the host and keyboard are all simple UDP packets, with a very basic structure. I won’t detail the protocol here, but if you’re interested I’ve written up the protocol and published it within the GitHub repo here. Effectively, here’s the main list of things that you can do:
Host to Keyboard:
– Set lamp lights on or off for each button
– Set the LCD button background to Off, Red, Green, or some alternating combination
– Set the LCD button text – 3 lines, 6 characters per line
Keyboard to Host:
– Get event when button is pressed or released
– Get event when the joystick x, y, or z axis value changes
– Get event when a rotary encoder is turned (+/- change value)
– Get event when the T-Bar position changes
Time to write some software…
I’ve written and published a .Net Standard 2.0 library to implement the keyboard protocol and make it easy to consume from an application. The repository (listed at the beginning of this post) makes it simple to subscribe to events and control the simple pushbutton lights and LCD display buttons.
The repository contains a console test application that subscribes to events and writes these events to the console output. It’s a good example of how to use the library, and I’ve included a snippet of the test program’s Main function below for reference:
using Spyder.Controllers.ScreenMaster3;

static async Task Main(string[] args)
{
    // Initialize connection to keyboard
    var keyboard = new KeyboardInterface();
    await keyboard.StartupAsync();

    // Subscribe to events from the keyboard
    keyboard.TBarValueChanged += Keyboard_TBarValueChanged;
    keyboard.KeyPressed += Keyboard_KeyPressed;
    keyboard.KeyReleased += Keyboard_KeyReleased;
    keyboard.RotaryValueChanged += Keyboard_RotaryValueChanged;
    keyboard.JoystickValueChanged += Keyboard_JoystickValueChanged;
    keyboard.KeyAction += Keyboard_KeyAction;
    Console.WriteLine("Listening for events");

    Console.WriteLine("Press enter to exit");
    Console.ReadLine();

    Console.WriteLine("Shutting down...");
    await keyboard.ShutdownAsync();
}
If you’re playing along at home, you can pull down the library and build it from source, or for convenience I’ve also published it as a Nuget package for easier consumption.
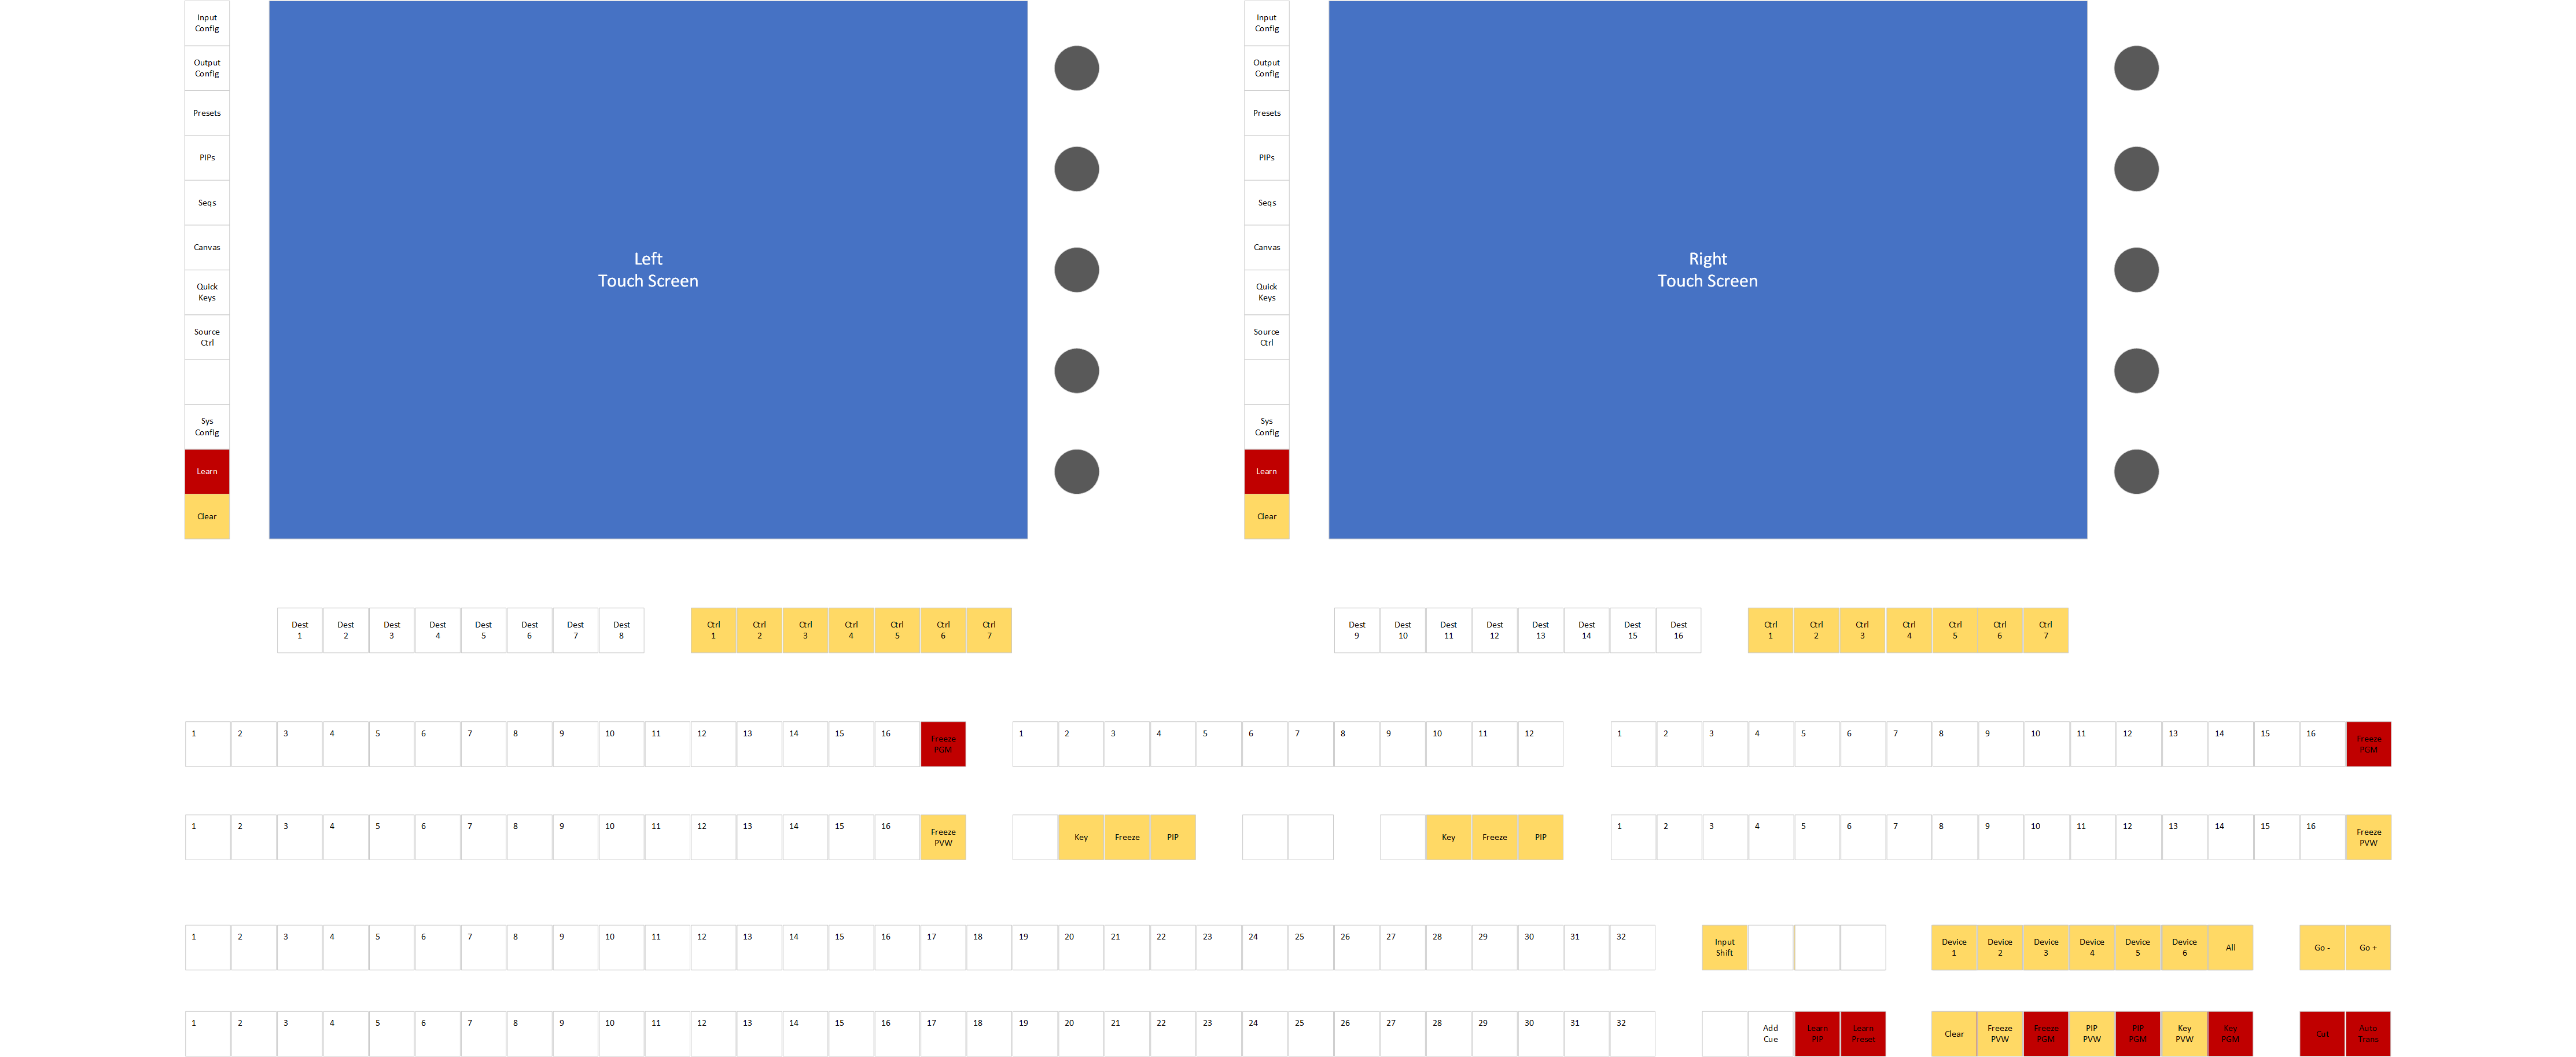
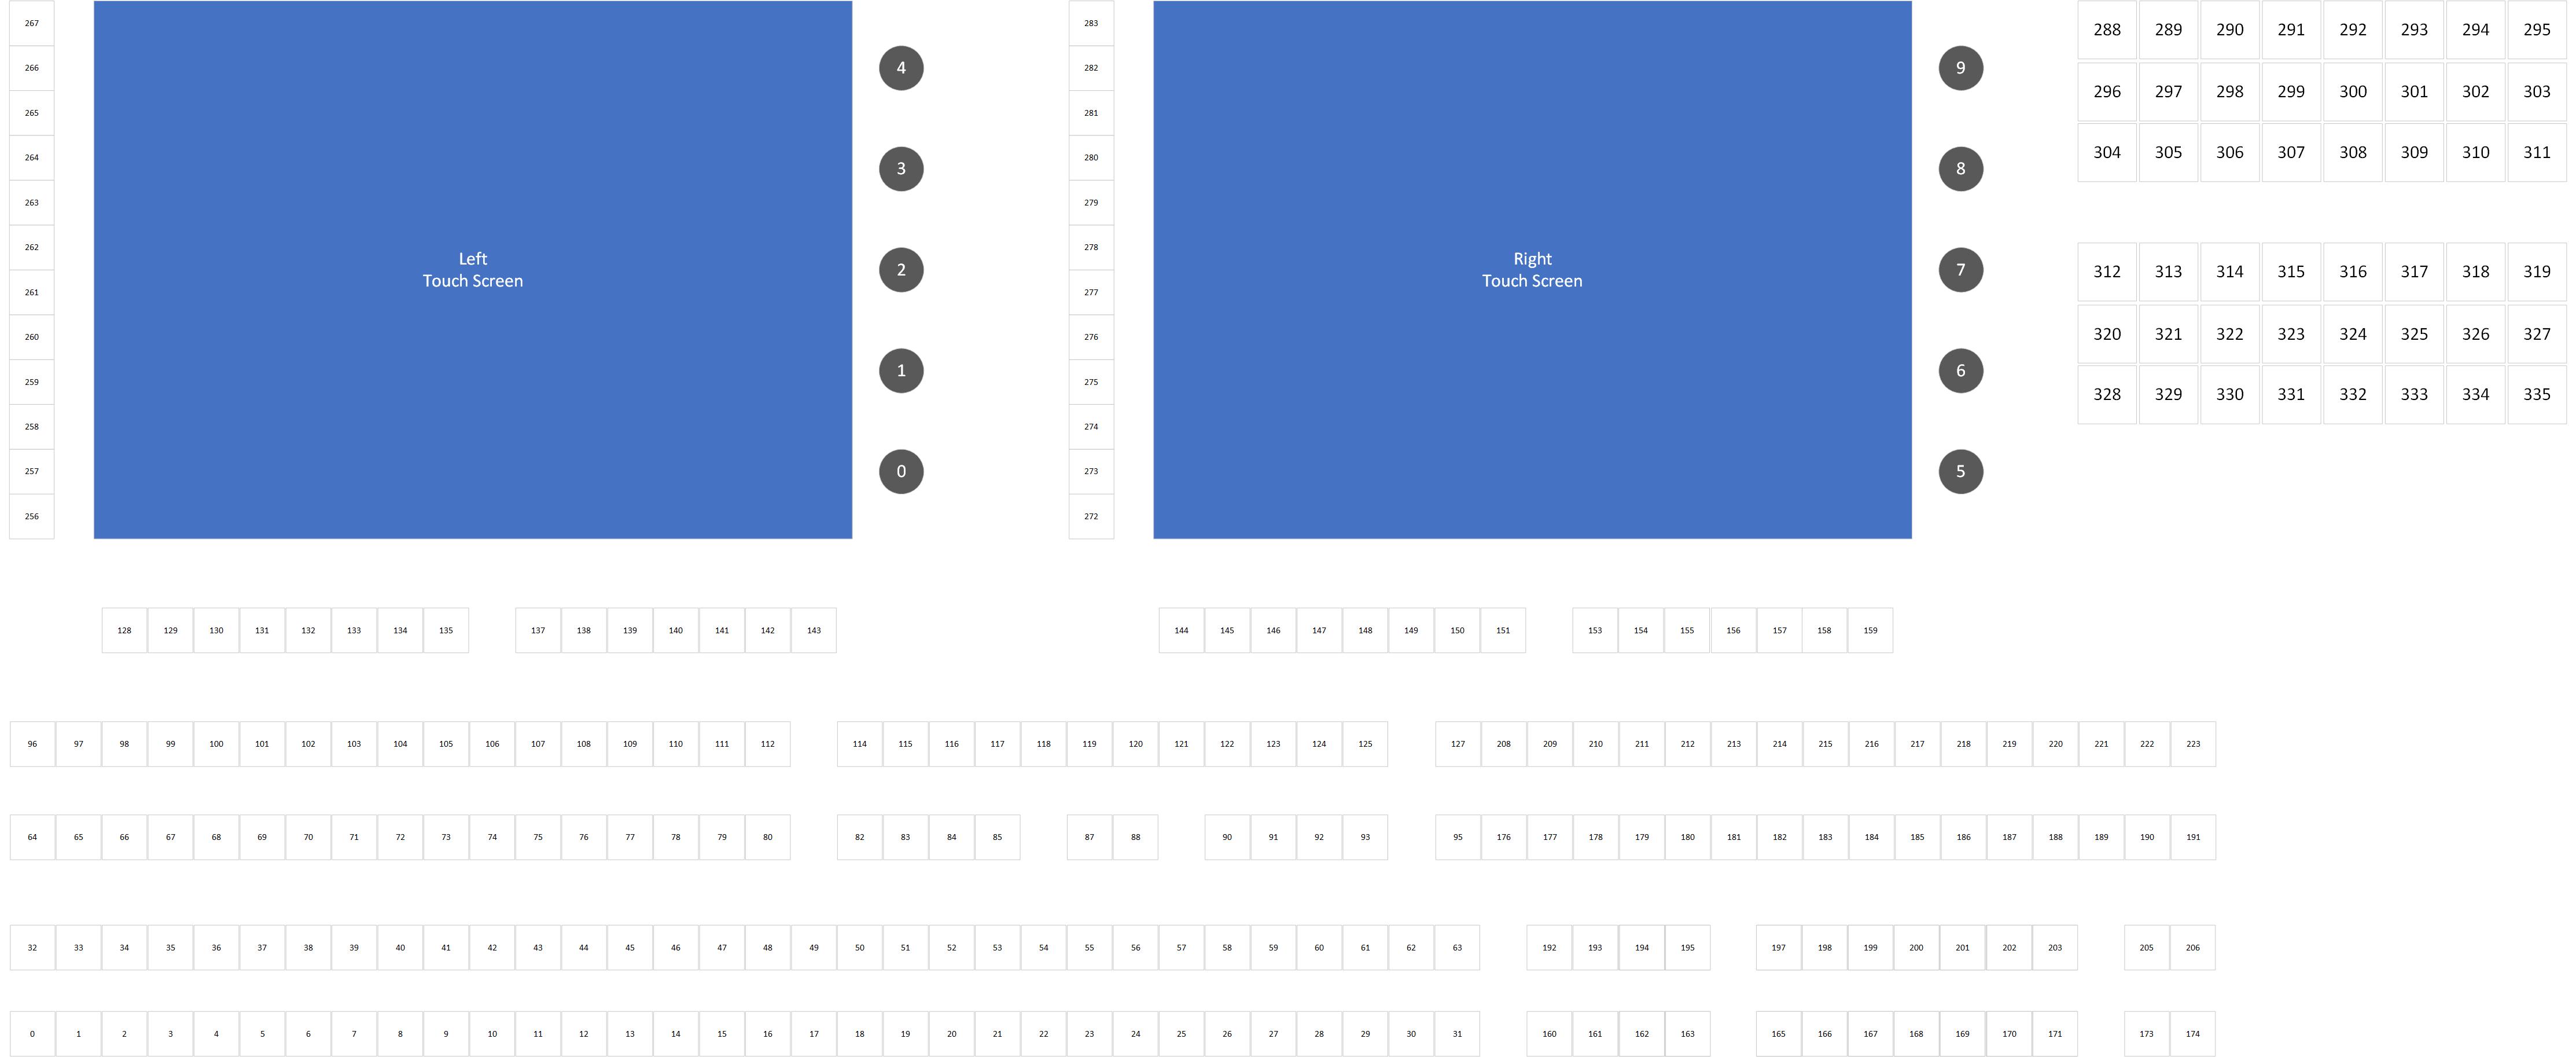
Mapping out the buttons
With a software driver library and a test application created, we can now go through the process of pressing and releasing every button on the controller, and watching the event data to determine the logical button ID associated with each physical button and rotary encoder. The console has well over 200 buttons, so it took a bit. My GitHub repo has a Visio document with some different pages that include the index map, and below is an image of this as well as a keycap map for the ScreenMaster III 3216.
Now where are we, and where do we go next?
At this point we have a controller with a modern computer inside, and we have a software library that allows us to interact with the hardware keyboard. With these in place, the real technical challenges are out of the way and we can focus on building an application to control something similarly modern. With my history and existing software libraries and software applications to control Spyder video processors, it’s probably not a spoiler alert to say this is where I’m heading.
I’m not sure yet if the next blog post will be software heavy (yet) – I’m planning to spend some time planning a good console application before diving too far into code. That being said, I couldn’t resist getting some simple app(s) started. As such, I’ll leave you with a quick video showing an app framework that works with the keyboard interface and is setting the selected page based from menu button presses.
If you’re still with me reading through this blog series, thanks! I don’t expect this project to amount to much more than a love letter to an old product that holds nostalgic value to me, but I hope it might resonate with a couple people out there. And if you’re lucky enough to have one of your own ScreenMaster III or a Montage controller lying around, let me know about it!